Introduction
With the right knowledge and equipment, you can brew beer quite easily. Assuming you have the right permits and aren’t breaking any moonshine laws, all you need are the tools to make it happen and a guide, just like this one!

Here we have a step-by-step guide to brewing beer, made simple so everybody can join in on the fun. You’ll find it below in three parts:
- Equipment Needed To Make Your Own Beer
- Ingredients For Beer Making
- Step-By-Step For Brewing Beer
With this format, you can figure out which equipment and ingredients you need, and then apply them in 11 steps. By the end of that process, you should have a finished beer product, though it may take you once or twice to perfect your brewing skills.
You’ll need to buy the equipment and ingredients, of course. That’s why we have included links below that give you more reading material about brewing and the brewing process. That way, you can be sure you’re getting accurate information, and you can also delve deeper into the world of brewing if you want.
Equipment Needed To Make Your Own Beer

With that covered, let’s get right into it with the equipment that you will need. Everybody’s brewery will have slightly different equipment, like a chef’s kitchen, because they may tailor the brewery to make certain beers.
To start, you should have a basic setup that allows you to make beer. Then you can scale it up if you want to expand the drinks that you can create. Here are 11 pieces of equipment that are necessary for those new to brewing.
“Ale Pail” Primary Fermenter With Lid
You’re going to need a pair of buckets to brew beer and one of them needs to have a lid. That would be your primary fermenter, which needs to have a lid on it so that the liquids inside ferment properly and aren’t exposed to the elements. Often, a lid is offered as optional, but you should get it if you plan on brewing beer.
We would recommend the Ale Pail primary fermenting bucket that comes with its own lid and bail handle. It’s nothing fancy, it’s a plastic bucket with markings up the side that help you figure out how much is in there, from 1 gallon to 5 gallons. When filled fully, it’ll hold 6.5 gallons of liquid inside its 17 and a ½-inch tall, 12-inch diameter body.
As you can imagine, a full bucket can get quite heavy. That is why getting a fermenting barrel with both a lid and a handle is so important, no matter the brand.

“Ale Pail” Bottling Bucket With Spigot
As for the second bucket, that would be the bottling bucket. That’s a tall storage device that comes fixed with a spigot, a convenient faucet that’s used to drain the liquid from the bucket and into, well, bottles. You may be able to get a fermenting bucket with a hole drilled into it, for applying a spigot and turning it into a bottling bucket, but for now, you should stick with having them separate.
Ale Pail also has its own bottling bucket that is similar to the first bucket we have covered. It has the markings, is 17 and a ½-inches tall, and also comes with a lid to keep the liquid inside safe. It is slightly thicker at approximately 13-inches in diameter but the total capacity should even out at 6.5 gallons. Make sure you add a spigot if one isn’t included so that it’s a bottling bucket and not a regular old bucket.
Easy Clean No-Rinse Cleanser
Next, you should get a cleaning product. Any tool should be kept clean for it to work properly, and that is especially important when you’re working with food/drink and ingredients that are fermented.
We would recommend Easy Clean as a brand, though any powerful no-rinse cleaning solution will do. One teaspoon of this solution should cover approximately 1 gallon of water, where it then mixes into the water and makes any beer or wine-making gear clean. We have more on how to clean your brewing setup below.
Airlock
You can’t just leave your brew in a bucket and expect it to ferment properly. To encourage fermentation without the development of harmful bacteria, you will need to have an airlock.
We’re not talking about something you’d find in a submarine, a brewing airlock is just a small and inexpensive tubing arrangement that’s full of water but lets CO2 out of the bucket, without inviting bacteria in. We would recommend you get a simple S-shaped airlock. They’re small and use the shape of an S, which is naturally easier to pass through for gas than it is for other forms of matter.
Siphon And Bottling Set-Up
When brewing, you’ll need to transfer a lot of liquid around. While the spigot helps with draining the bottling bucket, you will also need something that can transfer the wort into the fermenting bucket, and then the contents of the fermenting bucket out. That’s why you should get a siphon tube, a ½-inch tube complete with a siphon hose for larger brewing operations.
An auto-siphon tube will do the heavy lifting for you after it is positioned and you make a single stroke with it. From there, it should start siphoning without any added effort on your part.
Hydrometer
Hydrometers measure the consistency of a liquid. Maybe you haven’t thought about it much, but the consistency of beer and other drinks is very important to how they are perceived and tasted. You don’t want your beer to be a thick sludge, it should be light, carbonated, and refreshing.
That’s where the hydrometer comes in. It measures how dense your brew is, which then helps you know when it has fermented. Note that the hydrometer can only do this in certain temperatures, which will be demarcated on them or on their packaging, so you need to heat liquids to a certain point to get the correct measurements.
We’d recommend a triple-scale hydrometer so you can get the most out of it. It measures in specific gravity, potential alcohol, and Brix value, all important metrics for home brewers. Get a hydrometer with a test jar, if possible.
Here are the basic steps to using a hydrometer:
- The hydrometer and all other liquid-touching equipment should be sanitized and dry.
- Draw a small liquid sample into your test jar, without overflowing it.
- Bring the sample to the indicated temperature for measurement, typically between 60 and 70 degrees Fahrenheit.
- Hold the device by its top and twist slightly to avoid bubbles. The hydrometer should not touch the sides.
- Make note of the level at which the hydrometer sits on the liquid.
- Check to see if the readings are compatible with those you get from beer. We have more on keeping specific beer recipe literature below.
Bottle Cleaning Brush
There’s not much to explain here, it’s exactly what it sounds like! You’ll need to have a brush that is capable of getting into and properly cleaning the awkward shape of bottles and carboys. If you plan on using glass bottles, ditch the kitchen sponge and use something that is made for the job instead.
You should find brushes marketed for cleaning bottles. If you can’t, just keep in mind you need a thin, long brush with non-rigid bristles that should fit down the neck of a bottle and then expand outwards to clean the walls of its interior.
Twin Lever Bottle Capper
If you are bottling your beer and want to really finish it off properly, you should get a bottle capper. A twin-lever bottle capper resembles a pair of pliers but, instead of biting down on wires or other surfaces, the bottle capper uses the pressure to fix caps onto their bottles.
The best ones are made from sturdy materials that fit comfortably in your hand and have a crimping cup. The cup ensures that the sites of the cap are properly pressed down, creating a seal. They are often magnetized too, so caps stick to them easier pre-application.
Capping is important to removing excess air trapped in the bottle, ensuring that the beer bottle becomes pressurized and non-perishable.
Liquid Crystal Thermometer
Since you’ll be brewing, you’ll also need to have a thermometer of some kind. A liquid crystal thermometer tends to be the best for homebrewing, especially the sticker versions that can easily be applied to your buckets. Where they go isn’t very important, many place them midway on the bucket so that they give a general reading of the liquid inside.
Many stickers aren’t waterproof, even if they say they are, and so you may wish to put yours higher if the thermometer gets submerged by water during cleaning.
Bucket Clip
Like the bottle capper, this is a simple piece of equipment that just ensures things go smoothly. With your auto-siphon tube, you don’t want to stand there holding it while the siphon does all the work. That’s why bucket clips exist, which allow you to fix the siphon to your fermenting bucket. Then you can go and clean equipment or get ready for the next step of the brewing process while it auto-siphons.
Home Beer Making Booklet
Last but certainly not least, it helps to have some literature on making beer at home. Sure, you have this guide, but a dedicated publication will come with specific recipes and instructions that will help you achieve different results. They should also come with handy troubleshooting tips for setting up the equipment.
In this guide, we’re covering the general process of making beer. There is a lot of depth in this subject that is best explored by books and booklets, which can address more specific concerns and questions that you may have.
Ingredients For Beer Making

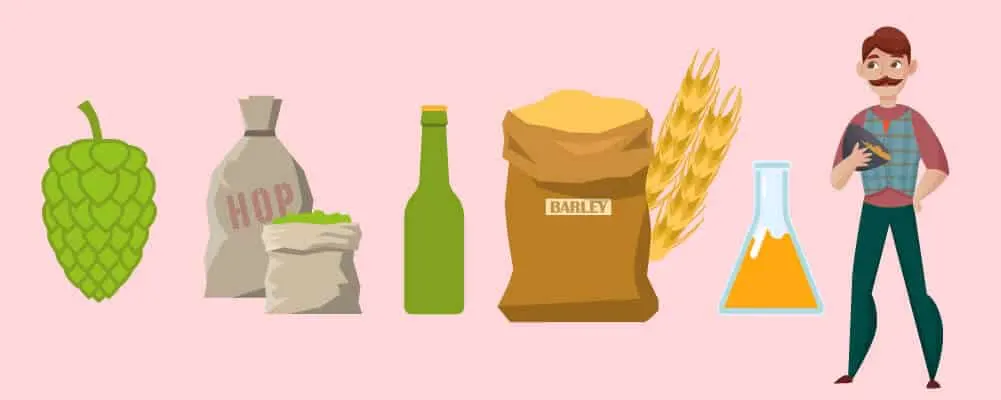
So, you now have some idea of what equipment is needed. That should give you some insight into how the brewing process will work. We still have our step-by-step guide below that covers the process in more detail. For now, let’s focus on the five main ingredients that make up beer.
Hops
Hops are technically flowers, though you wouldn’t know it if you saw them in the wild. Belonging to the Humulus lupulus plant, hops are small, green cones than any other plant product. They’re rich in alpha acid, which is where the bitter taste of hops comes from. Alpha acids are represented in percentages and, the higher that percentage, the more bitter the end product will be.
The alpha acids aren’t very water-soluble, which is why they need to be boiled for an hour to get the bitterness out of them. The exact acid content of hops will vary from crop to crop and between regions of origin. If a brewer (see also: Brewers Conferences In America You Have To Go To)has a successful brew, they will typically try to source hops from the same supplier so that they can replicate their success.
Hops can also be added near the end of the brewing process to add fragrance to the drink. We’re sure you know the relationship between smell and taste, which is why the hops are used.
Grains
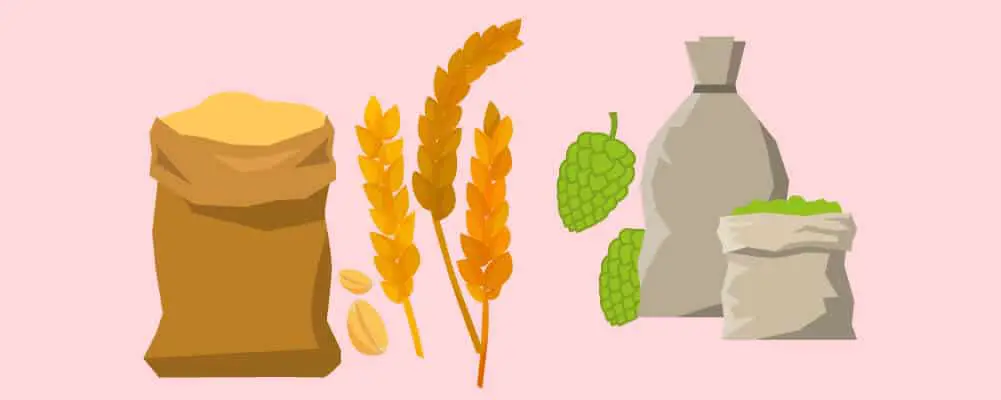

Grains are the main ingredient in many alcoholic drinks and, when you are brewing with malt extract, it’s still a good idea to add some. Specifically, you should seek out specialty grains that are ideal for being used in small but potent amounts. They can give your brewed beer more color, body, and even flavor when used right.
Getting these grains from a good supplier is important, you don’t want to get a product that is outdated and hasn’t been stored properly. Buying from shops that specifically sell to homebrewers, locally or online, should leave you with good ingredients after your purchase.
The grains need to be crushed first in a process known as milling. You can use a dedicated grain mill for this or some other means of crushing the grains into a fine mixture. Some places even offer services to do it for you, but this is more expensive. Crushed grains won’t store, so you need to use them quickly after they have been processed.
Malt Extracts
As we said above, we’re using malt extract for today’s beer brewing recipe. Using malt extract is convenient and much easier for beginners to work with, and it creates an enjoyable product at the end. Beginners and pros alike swear by malt extract and, if you want to experiment, you can do that later after learning how to make basic beer from this guide.
You can get malt extract in two forms which affect how they work and how much you need to use during the brewing process. Here’s a rundown of how to generally measure the original gravity of your wort when using both malt extract types:
| Liquid Malt Extract (LME) | Dry Malt Extract (DME) |
| 1 pound of LME in 1 gallon of water
= 1.044 original gravity | 1 pound of DME in 1 gallon of water
= 1.037 original gravity |
Yeast
You don’t get a beer without using yeast. Yeast is what turns your wort into the beer during the fermentation process by consuming malt sugars and creating CO2 and alcohol. Yeast for brewing also comes in two main forms, dry and liquid. You can get either but dry yeast was traditionally considered to be of poorer quality. That seems to have been rectified in recent years, however, and there are advantages and disadvantages to using both.
Here’s a brief rundown:
| Dry Yeast | Liquid Yeast |
| Dry yeast has a longer shelf life | Has a shorter shelf life |
| Requires minimum preparation to use | Comes in many more varieties than dry yeast |
| Requires careful handling to avoid waste |
Water
As we included above, water is a big part of the brewing process. It’s no surprise, water is in everything, especially liquids. With beer, it’s the base that ties together all of the other ingredients involved, and the end product is over 90% water!
Naturally, any water you use should be clean. That doesn’t mean it should just look crystal clear, it should also smell like water instead of any additives or pollutants like chlorine. Note that water has a hardness rating too, which is how much mineral residue is in the water. Similarly, you should also know the pH level of the water that you are using. Good brewing water is moderately hard but with a low to mid-level alkaline content.
If it isn’t up to those standards, there are ways to alter your water. Places that sell homebrewing equipment should also have water on sale too.
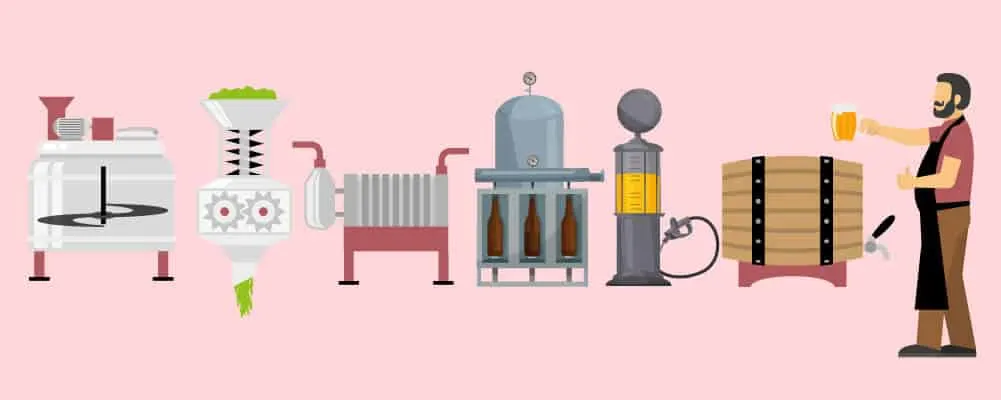
Step-By-Step To Brewing Beer

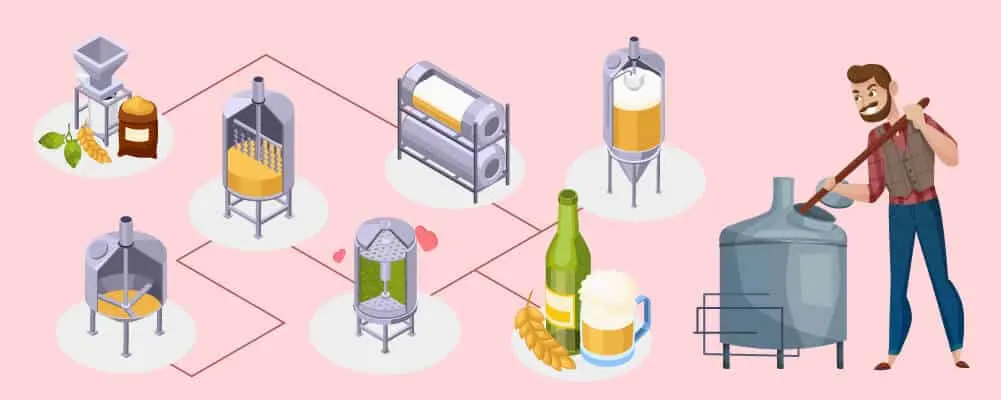
Now that you know about the equipment and ingredients required to make beer, you’ll be able to understand our step-by-step guide. We have outlined the entire brewing process in 11 steps below.
The steps, as we have described them, should yield approximately 5 gallons with an original gravity of 1.057, a final gravity of 1.014, and an alcohol volume percentage of 5.55%.
Clean And Sanitize
To get started, you first need to make sure that all of your equipment is cleaned and sanitized. It’s not enough to give them a cursory cleaning treatment, you need to purge them of any bad bacteria or residue that could quickly spoil a fermenting mixture.
In fermentation, even the tiniest amount of contamination will grow into the mixture and spoil it. If you’re struggling to figure fermentation out, it’s essentially making a sugary wort liquid that yeast then consumes, leaving behind alcoholic byproducts when it’s done. Unfortunately, many other microbes love to eat sugar too, and so they can’t be allowed into the brewing equipment.
When cleaning, remember to:
- Wear rubber gloves and face protection if there is a possibility of splashback.
- Add chemicals to water, never water to chemicals.
- Follow the packaging of any chemicals very closely.
For cleaning, you’ll just want to give the equipment a once-over to make it spotless, with no visible dirt. Avoid scratching plastic gear, it creates a surface that bacteria can hide in. For sanitizing, you need to attack the microbes. They are best fended off with regular pre- and post-brew cleaning.
To get the best sanitization, you should check out the no-rinse cleaner that we recommended above. They’re great as a supplement to the typical cleaning process, allowing brewers to add the solution to water and then wait for it to do its job sanitizing the equipment. Note that no-rinse solutions only sanitize, they do not clean.
Steep Your Grains
Next, you should steep your specialty grains to get the best out of them, just like some do with coffee beans. Barley, oats, and wheat can be used, though barley is the most popular by far. This recipe used victory (0.25 pounds), crystal 120L (0.5 pounds), and dark Munich (0.5 pounds) specialty grains. Steeping your grains involves a few simple but important steps:
- Place your grain into a muslin bag and tie it closed.
- Place the bag in warm water. Press down any floating grains to make sure they become saturated.
- Steep for 20 minutes. Keep the water on medium heat if it cools down too quickly due to room temperature/weather.
- Remove the bag with a spoon after the 20 minutes are up. Wait for the water to drain, don’t apply pressure to squeeze the water out.
- Throw away the grains and the bag.
What you have left is now wort. Wort is far from the beer that we consume, so we need to boil it first.
Start Boiling
To start the boiling process, you should get a brew pot and grab your malt extract and 1 ounce of cluster hops. Throw them in and stir the wort until the malt has dissolved. It dissolves because the starch inside the malt is broken down and turned into sugar. If anything doesn’t dissolve, it will burn at the bottom of the pot and hurt the brew, so stir to catch any leftovers.
Add Aromatic Hops
The boiling process will take about 50 minutes to an hour, after which you should add an ounce of Saaz hops. These are your finishing hops, added for aroma and taste. You only boil them for five minutes.
Some beers use more hops than others at this stage but, for a beginner, get used to using finishing hops sparingly at first.
Cool The Wort
After an hour of boiling, your wort will need to be cooled before you can do anything else with it. In fact, you must cool it to below 100 degrees Fahrenheit as fast as possible to get the best results. Some recommend a wort chiller but we haven’t included that in our equipment list because they are oriented towards industrial-grade brewing. You’re not brewing large amounts here, so leaving it to cool naturally will be fine.
Transfer The Wort To The Fermenter
When the wort has cooled down, you need to move it to the fermentation bucket you have bought. You can’t just pour it, you need to use the siphon. If you’re using an auto-siphon then clip it on and start the transfer process.
Once it’s fully transferred, top it with cold water until you hit 5 gallons. Our recommended bucket has markings on the side that will help you see how much 5 gallons is. Here you should also put the lid on and very carefully rock the bucket. This is to get air into the wort mixture.
Determine The Original Gravity
Now comes one of the tricky parts of brewing. You need to use your hydrometer to figure out the original gravity of yeast, which is just a calculation of how much fermentable sugars are left in the wort. It can get quite technical and there are often equations involved.
A well-labeled hydrometer should be easy to work with. Write the original gravity number down somewhere – it’s important for a later calculation.
Pitch The Yeast
Now it should be time to add your yeast, or pitch as brewers say. As we have said before, the yeast eats sugar and creates alcohol. It also creates CO2 but that is less important for brewing. Cool the wort to around 78 degrees Fahrenheit before you consider pitching unless otherwise directed on the packaging for your yeast product.
Once the yeast has been added, the fermentation process begins! Shut the fermenter as tight as you can and attach the airlock, so all that CO2 has somewhere to go as the yeast does its job. Fill the airlock with water, to make sure it keeps things out.
Let The Wort Ferment
Store your fermenter bucket somewhere where it won’t be disturbed. CO2 will start to escape the airlock within a day or two but otherwise, it’s not very exciting to watch. Instead, you should forget about it, maybe brush up on some more brewer reading, for one or two weeks. Don’t disturb the fermenter prematurely in any way.
Careful brewers might add another round of fermentation by siphoning their mixture into a glass container. This is optional and we haven’t included it in the scope of this guide, but it’s an option if you have a few carboys laying around. If you do, it’ll take another week or two of waiting again. Doing this results in less sediment once the beer is bottled.
Fermentation time differs across all beers, as does the temperature that the fermented beer is kept at. Lager is made in colder conditions than ale, for example. For now, you shouldn’t worry about these distinctions, you should tackle your first batch of ordinary beer instead. Once you find your legs, you can start experimenting with different fermentation times and processes.
Determine Final Gravity And Calculate ABV
We hope you wrote down the original gravity of your beer – here’s where it becomes relevant. You need to use the hydrometer again to determine the beer’s final gravity, now that the fermentation process is completed. Then you can use it to figure out the alcohol by volume, commonly shortened to ABV.
To do that, you’ll need to use this formula:
ABV = (Original Gravity – Final Gravity x 131.25
Your beer should report an original gravity of 1.057 and final gravity of 1.014. Don’t worry if it’s slightly different, this may be alchemy but it’s not an exact science. It all depends on the equipment you have, including the sugars that are extracted from grains/malt and the yeast that you use to eat it up.
Let’s assume you got the same numbers as we did. In that case, we’re looking at this:
(1.057-1.014) x 131.25 = 5.64%
For a standard beer made with these ingredients and this equipment, a 5% ABV yield is exactly what we would expect.
As a final note on ABV and the gravities – you may find that industrial brewing operations or certified professionals use much more complex and accurate means of calculating the ABV. Since we’re homebrewing, and the results are accurate enough, it’s easier to do this simple equation instead.
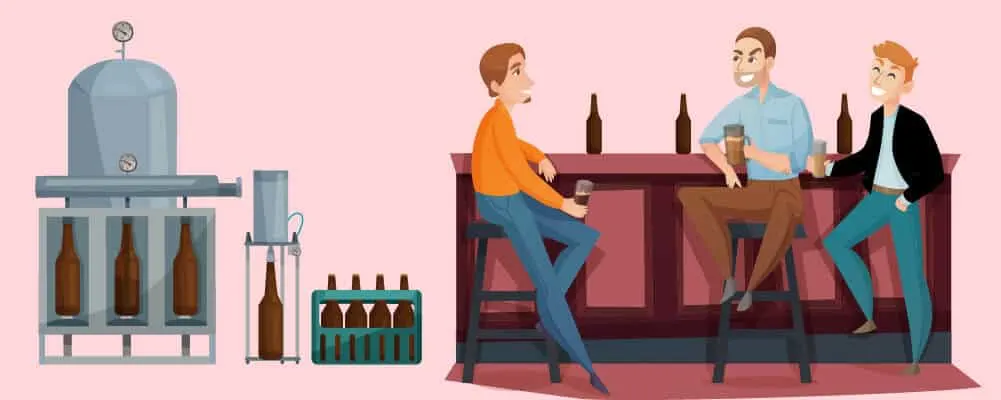
Bottle The Beer
All that is left now is to bottle the beer. This means you need to break out the siphon again, this time to move the finished beer from the fermenter and into the bottling bucket. Take some time to appreciate how different the mixture looks, from when you first siphoned it.
At this point, some recipes might ask you to add things into the finished beer, like some sugar for instance. Add them into the bottling bucket if that’s what you need to do, our recipe here doesn’t have any additives.
Then you should move the beer from the bottling bucket and into some bottles – and eventually your beer fridge. This is typically a simple three-step process:
- Get your bottles and bottle caps ready. For a 5-gallon batch, you can make nearly 50 12-ounce bottles. Clean and sanitize the bottles with a bottle cleaner and a non-rinsing sanitizer, as you used for the first cleaning process.
- Attach the siphon hose to your spigot and then the bottle. Open the spigot and use the auto-siphon to start the process easily.
- Fill some bottles, leaving roughly an inch at the top. Cap them with a capper and then store them at room temperature, away from sunlight. Let them sit for 2-3 weeks for them to carbonate properly.
Summary

Now you should have made a batch of standard beer. It’s not the most exciting thing you can brew but you made it yourself, which is something to be proud of. By doing that, you should now have some knowledge of the brewing process. You can build off of that knowledge to make other beers, but they will all fall into the steps that we have outlined above.